compressed files

How to Handle Your Compressed Files

Is your hard drive almost full? Do you need to save space on your computer without losing precious data?

The best way to do this is by compressing your files. Compressed files have smaller file sizes and take up less space on your machine. Furthermore, they are easier to share and quicker to upload to Google Drive or DropBox.

Compression is a useful tool for people who frequently work with videos, music, graphics, and other data-heavy files. But what’s the best way to compress files and which compression formats should you use?

Keep reading to find out how to handle your compressed files.

What Is File Compression?

A compressed file is also called an archive file. The archive contains several files inside which have been reduced in size.

A compressed file is smaller than the original, meaning it is easier to transfer and takes up less space on your computer.

Using a regular computer you can compress and uncompress files easily. When you uncompress a file, it returns to its regular state without losing any data.

Compressing Files

On Windows, it only requires a few clicks to compress (zip) a file. First, create a folder on your computer with the files you want to compress inside. Then, right-click on the folder and select “Compress (zip)”.

Alternatively, you can use third-party software such as 7zip to compress your files.

If you own a Mac, zipping files is also super easy. Mac computers come with an inbuilt Archive Utility that allows you to zip and unzip files in no time.

To zip on a mac simply right-click on the file you want to compress and select “Compress”. To zip multiple files at once, shift-click to select them, then right-click one of them and select “Compress”.

How Does File Compression Work?

When it comes to file compression, there are two main types – referred to as lossless and lossy compression

Lossless

Lossless compression reduces a file’s size without causing it to lose any important data. Rather, the file size is reduced by removing redundant information.

Redundancy refers to the same piece of data being stored in several places. By removing redundancy, you are left with a single copy of each piece of data.

In other words, the file contains the exact same information, but in a simplified form.

Lossy

Unlike lossless compression, lossy compression results in the permanent loss of certain data points.

The type of compression is commonly used for media files like videos, images, or music tracks. In most cases, it’s impossible to notice any difference between the compressed and uncompressed versions.

However, if you compress the same file multiple times, the quality will begin to degrade.

Why Compress Your Files?

If you work with large files every day, then you’ll know the importance of file compression. Large files can strain your bandwidth and fill up your computer’s storage space.

Uses Less Space on Your Hard Drive

Your computer has a finite amount of storage space on its hard drive and hoarding files can fill it up pretty fast. In fact, holding on to large files is impractical and might slow down your computer.

One way to deal with this issue is to compress your files using Zip or another compression facility. 

Why not put all your unused files into a single archive folder? Or zip up your movie collection?

More Efficient File Transfers

Another benefit of compressing your files is quicker and more efficient file transfers.

For example, uploading large files to Google Drive or DropBox can take a long time. Compressing your files can make the process a whole lot easier. Whoever receives the file can extract it on their end and they’ll have everything they need.

File Compression Formats

There are several different popular file compression formats. Here are some of the most commonly used ones.

ZIP Files

Zip is one of the first and most popular file compression formats. Most Zip compression software uses an algorithm called DEFLATE. This algorithm is lossless so no data is lost during the compression process.

Zip compression allows users to compress large amounts of files into a single archive. The compression process is also fast and efficient. All the popular operating systems support Zip files, including Windows and Linux.
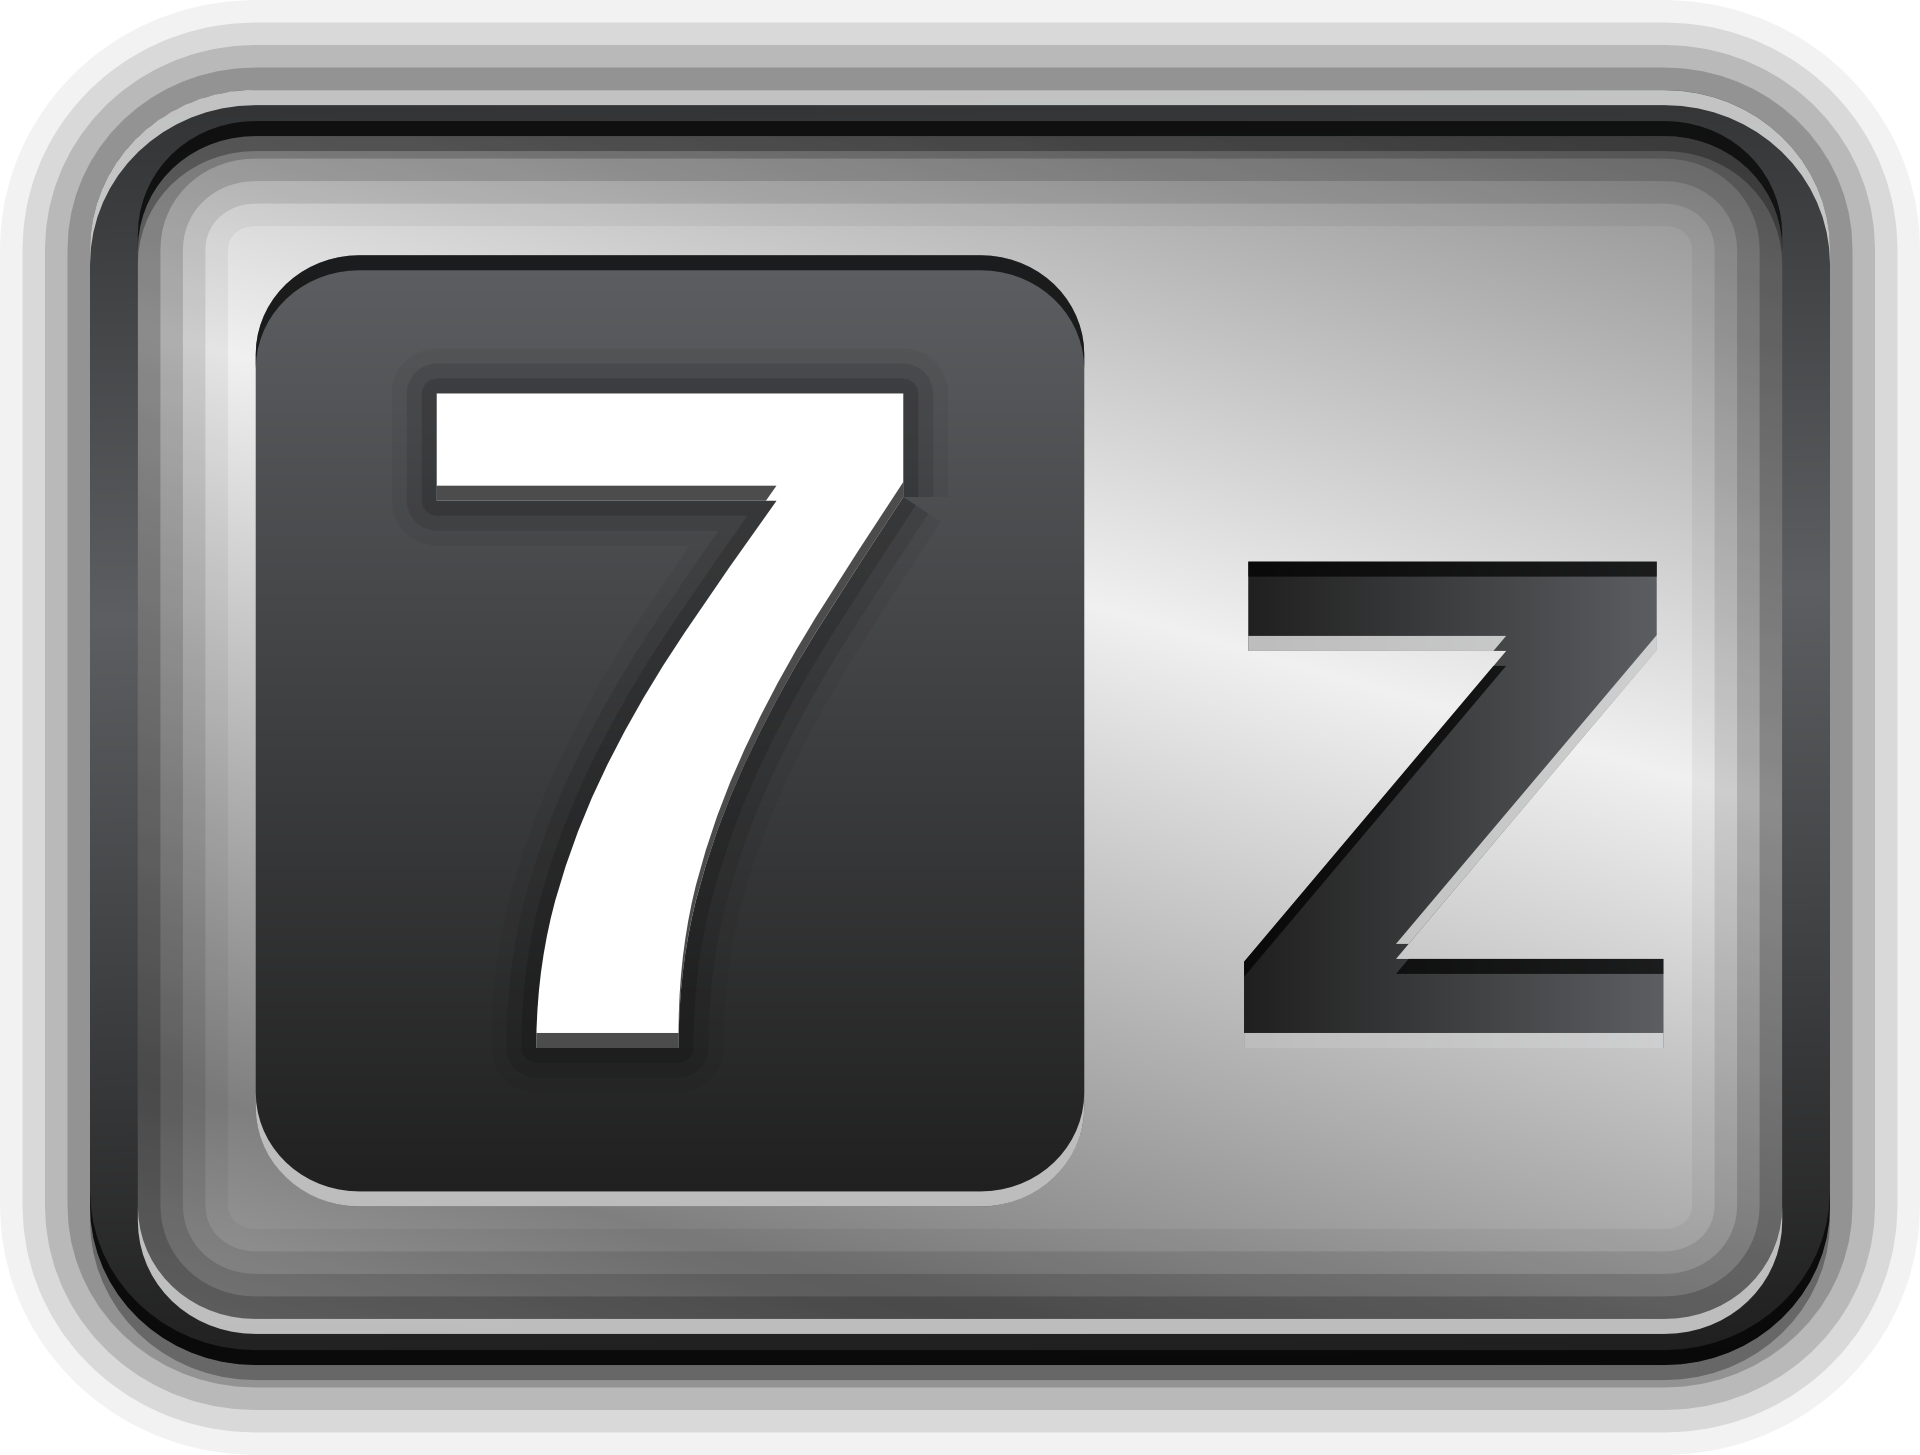
7z Files

The 7z file compression format is open-source and uses an algorithm called LZMA. This algorithm is powerful and assures 100% lossless compression.

In fact, when compared to RAR and Zip, 7z offers the most powerful file compression capabilities.

Due to its open-source nature, you can download 7z software and use it as much as you like. The 7z compression process is effective and efficient. In fact, 7z is the most powerful compression type on this list.

RAR

Developed by a Russian software engineer, the RAR compression format is another effective way to compress files.

RAR is known for its unlimited trial period. Although it’s only supposed to last for 30 days, the service does not stop and can be used indefinitely.

The RAR format works especially well with audio files as it doesn’t distort the sound or quality of the track. RAR is also more efficient than Zip.

Convert Your Compressed Files Today

Compressed files take up less space on your computer and they’re easier to transfer over the internet.

File compression can either be lossy or lossless. Lossy compression removes some of the file’s data in order to reduce its size, while lossless compression removes redundancy but retains all of the original data.

Have you got a certain type of archive file that you need to convert? Maybe you want to turn your 7z file into a RAR file? Use Offdrive to convert all of your files for free! 

doc to html

Convert Doc to HTML: What You Need to Know

Looking for an easier way to write your webpage?

HTML is the easiest programming language to learn used across most webpages. If you’re a beginner programmer creating a website, HTML is the best way to go. It’s also the most accessible language as you don’t need a special program or app to use it.

All you need is a text document, and you’re good to go. Want to know how to convert Doc to HTML? Read on to find out more!

1. Use Microsoft Word

It’s the most obvious method of converting a Word document to HTML. It’s easy to understand since it’s simple enough. First, open your desired document in this application.

After that, go to the File menu located at the top-left corner of Word. Click on the Save As option. You’ll see a list of locations where you can save the document.

These locations include any folder on your computer or cloud storage online. Put your desired file name and select the appropriate file type. You can find this field below the file name as a dropdown menu.

Select the Web Page option from the “Save as type” menu. It will allow you to save it as an HTML file using its built-in features. The HTML code is bulkier, but it’s a quick conversion perfect for simple web projects.

Do you want a simpler file? If so, click the “Web Page, Filtered” option. It keeps the style, instructions, and content and strips the more complex codes for the layout.

Not familiar with Microsoft Word? Check out this guide to the common Word functions that help make your document better.

Limitations of Converting Word Documents to HTML

The convenience Microsoft Word gives when converting pages is invaluable. It’s great when you’re looking to upload pages on your website quickly. However, this may not be the best app for long-term online publishing solutions.

When used as a web page editor, Word has some non-standard practices. It puts strange styles and tags to the resulting HTML code. These tags can affect the code’s cleanliness, mobile responsiveness, and loading speed.

2. Use a Web Editor to Convert to HTML

Lots of web editors come with features used for converting Word documents to HTML files. The example we’ll use in this guide is Adobe Dreamweaver. It’s better than Microsoft Word since it gets rid of the weird styles and HTML codes added by the application.

When you use this web editor to convert Doc files, your pages won’t appear as documents. Instead, they look like real web pages.

Start by opening Dreamweaver and pressing the File menu. Select the Import option and Word Document. Pick the choice that says “Previously Saved File” and click the Enter button.

Dreamweaver imports the Word file’s contents into an HTML file. You can view it using the Design view of the application. In the Code window, you’ll see the content in between paragraph tags.

After that, save the HTML file to your computer.

3. Use Google Drive

Google Drive is an online platform that lets you store various files and do other tasks. One of these is converting files. It’s a convenient and trustworthy platform that only requires a free Google account.

To start, use a web browser to go to the Google Drive website. Sign in using your Google (Gmail) account to access its features. Once you’re on the main interface, click the +New button located at the top-left corner.

Select File Upload from the resulting dropdown menu. It’s the second option below the Folder. Pick your Word document from the list and click the Open button to upload your document to the Drive.

Once the document is on Google Drive, right-click to make a context menu appear. In the choices, click the “Open With” option to expand it further. Click Google Docs to open your Word document on this application.

On Google Docs, click the File menu and select Download. On the options, click “Web page” since it’s what converts your document to its HTML version. When prompted, click either Save or OK to green-light the download.

4. Use OffDrive

One of the easiest ways on how to convert Doc to HTML files is using our online converter. It’s free and only requires an internet connection and a browser. Start by going to our homepage, where you’ll see lots of conversion options.

Under the “Convert Documents” section, you can select the DOCX to HTML or DOC to HTML options. It depends on the format of your chosen file. You can also do this when using our navigation bar.

Once clicked, it will take you to our conversion page. Press the green Browse button to look for your desired document. After that, complete a simple CAPTCHA test to let us know you’re human.

Once done, a green button that says “Convert to DOCX to HTML” will appear. Click it to start the conversion process. It only takes a few seconds, depending on the size of your document.

Select the green Download Now button to download the converted file to your computer. If you want to convert another document, click the Convert More Files button. It will take you back to our homepage.

Conversion Problems?

Did your conversion produce undesirable results? If so, it’s better to convert your Word document file to PDF first. Do this using our converter with the abovementioned steps.

Use our DOCX to PDF and PDF to HTML converters. In most cases, it will help fix the problem. Otherwise, it might be due to compatibility issues.

Convert Doc to HTML Today Using Our Converter

These are some of the methods used to convert Doc to HTML files. It’s better to work on a dedicated application if you want a more serious web page. However, if it’s simple projects, using Word is decent.

Need to convert your files fast? You can start converting your Doc to HTML today with our converter.

file conversion software

The Importance of Using Great File Conversion Software

Converting files is a blessing since there are tons of different file formats existing today. A file conversion software is a tool to convert existing files into a different format. There is plenty of software available on the market, but not all are reliable, safe, and effective.

However, the right conversion software will greatly benefit you and your business. Why is it so important to find the right file conversion software? Here are a few benefits and reasons why you should use file conversion software.

A User-Friendly Tool

A file conversion software typically has a layout that many beginners can understand. The placement of tools and buttons makes it easy to navigate the software to convert files. You can also visit websites that can convert any file type in only a few seconds.

Most conversion software comes with an easy-to-follow guide to look around the workspace. You can find many PDF, sound, movie, and text file conversion software available on the market. One great example of easy-to-use software is our PDF file conversion software at Offdrive.

Keep the High-Quality File

A great file conversion software allows you to keep the same or better quality when converting. You can also use the software to adjust the quality to suit your needs. Owning the best software benefits any formal presentations needed.

You can make the files stay in high-quality standards with the software’s tools. Conserving quality is especially essential for sound and movie file conversion software. Some software may lower quality due to compressing the file for more space.

Provides Multiple Features

One of the reasons why you should rely on reliable file conversion software is the tools. There are many features available for making adjustments and editing. Simple features like drag and drop, scheduled conversion, and auto-save benefit your experience.

File conversion apps can also convert files in batches, saving plenty of time. These features benefit your editing, formatting, time, and money with conversion software. For example, a movie file conversion software has effects and transition libraries.

Compatible With Different Devices

How does a file conversion software further your user-experience and accessibility? The ability to convert using any device, from laptops and pcs to phones and tablets. Imagine working a text file, PDF, movie, and sound file conversion software on several devices.

Most software features the ability to transfer conversions with a smooth flow. It’s also a plus to have the ability to link your conversions to different devices. Compatibility is essential for your need to convert files in groups for projects.

Cost-Efficient Solution

Investing in the best file conversion software will save you both your money and time. You can find both editing and converting tools needed with good software. There would be no need to find a separate app to convert and edit your files.

You also wouldn’t need to hire professional services to help you process your files. A file conversion software would have simple instructions for beginners. You can save a lot by doing the work yourself with editing, converting, and compressing files.

Convenient and Simple to Use

Convenience is an important factor to consider, especially if you are converting for your business. Most file conversion software is an all-in-one app with many management tools. It’s a huge benefit purchasing only one software for multiple tools and features.

Accelerate Work Speed

Most software offers automated conversions, which saves time for many businesses. It benefits companies who have a set workflow with limited time. Owning a company file conversion software increases productivity and services.

Downloading plenty of tools can get confusing and take plenty of time to edit and convert. A file conversion software will be enough to create standardized and searchable converted files. You are less likely to run into issues when you rely on great file conversion software.

Greater Reliability and Security

If your business relies on frequent file conversions, your employees may download their own software. They may end up downloading an unknown and untrustworthy file conversion software. Your important documents may end up getting compromised.

There’s also the chance of getting downtime, server time-outs, and incomplete conversions. Conversion apps typically remove uploaded files after conversion for better privacy. With the right software, you won’t have to worry about security issues and cybercrime.

Shows Professionalism

A free file conversion software is great, but some are not designed for business use. Free converters usually leave a watermark on the converted file. It’s not a great way to establish a professional identity with clients.

Online file converters also have some drawbacks with limited ability to convert groups of files. Investing some cash in reliable converters will give you full access to the tools. Having a dedicated business converter increase professionalism and high-volume conversions.

Customizable and Flexible

Professional file conversion software will give you control over your output settings. You can change the production and file conversions of your documents, audio, movies, and PDFs. The customization gives more options to adapt to your needs, workflow, and storage.

You can pick low-quality images to high-quality versions, depending on your needs. File conversion software can provide for certain needs, like converting wide-format text documents. The flexibility of file conversion software takes all user’s needs into account for custom needs.

Consistent Conversions

File conversion software is your all-in-one tool that can replace many programs. Using dedicated software, you are more likely to make consistent conversions. It also makes it easier to teach your employees how to use the software.

The converted files will always stay in the same format and layout for consistency. You will get file outputted at a similar size to benefit your storage space needs.

Convert With Ease Using a Reliable File Conversion Software

Now that you know why you need file conversion software, are you looking for one now? We offer conversions for archives, images, spreadsheets, and documents. Test out our free online file conversion for your work reports to school projects.

xlsx to pdf

XLSX to PDF: How To Convert Your Work Spreadsheet Into a Simple File

Do you want to learn how to convert a spreadsheet into a different file? Do you want to learn what other file types you can convert your spreadsheet into? 

Spreadsheets are important tools in business and other fields. It’s a tool for account and calculation, budgeting, data exporting, generating reports, and more. Spreadsheets are quite useful that it’s impossible to imagine a world without them.

However, it’s different to imagine a world where spreadsheets can become more than XLSX files. In this guide, we’ll talk about how to convert your XLSX to PDF files, online documents, and more. 

Save XLSX to PDF on Excel

Let’s begin with converting a file ending with XLSX to PDF. This process is simple, and you won’t need any other tools except Microsoft Excel to finish the task. Step one is to open the workbook that you want to save as a PDF through Excel.

Next, click on the File tab at the upper-left corner of the top ribbon menu. Select the Save As button and then wait for the Save As window to pop up. Under the type of file you want the spreadsheet saved into, change it from Excel Workbook to PDF.

Don’t forget to rename the file as you like before you click Save. You can also select the folder where you want the spreadsheet to appear as a PDF file. When saving PDF files, you can also select and set certain options for the output file before you click save.

Benefits of Converting Spreadsheets to PDF

If you’re handling files with sensitive information, you want to make sure that only a few people can edit them. When you convert a file to PDF, you can select the “Restrict Editing” option in the dialog box. This will prevent the saved PDF file from getting changed without your permission.

You can also keep your file from getting viewed by people you don’t allow by adding password protection on it. The spreadsheet-turned-PDF file will not open unless the user enters the correct password. It’s a great way to keep unwanted eyes from viewing your data.

Also, PDF files can contain the same data but have a smaller file size. They’re the ideal format if you want to learn how to email a spreadsheet without going over the file size limit. PDFs are also ideal if you want to post the spreadsheet online onto your company website or other.

Converting an XLSX Online via Google Docs

If you need to upload your spreadsheet online anyway, you can use this procedure instead. Open your browser and go to Google Docs by typing it in the search bar and selecting the link. You can also head straight to Google Docs by entering the link “docs.google.com” to the search bar.

Before you continue, make sure you’re logged into your Google account. Next, look for and click on the File picker. This is the small folder icon under the templates area, next to the file sorter and view mode.

Select “Upload” and then click on the button to select a file from your device. If you have your File Explorer open, you can also drag the spreadsheet file into the upload area right away. Wait for your XLSX or XLS file to open online on the Google Docs Sheet Editor.

Now, open the File tab, which is on the top menu bar, and select Download  > PDF document (.pdf). Your file will get converted to a PDF file and downloaded to your local device on automatic.

Now, you have a local PDF file and an uploaded spreadsheet on Google Docs.

Using Preview to Convert Your Spreadsheet

If you are a Mac user, you can use the built-in app Preview to convert XLS or XLSX files to a PDF file. You can also convert them into other common file types, like TXT, Images, and more. The first step is to open the Excel spreadsheet with Preview.

You can do this by right-clicking on the file before opening it and selecting Open With > Preview. Select the Preview App. Once it opens with Preview, open the File menu and choose “Export as PDF.”

A new pop-up dialog box will show you the different options you can use. Change the file extension to .pdf and then select the destination folder. Click on Save, and you can now use the PDF-converted spreadsheet as you like.

Converting to XLS or XLSX to PDF With Offdrive

Let’s say you don’t have Excel or Preview installed on your computer. You also forgot your Google log-in details and access your Google Drive. A quick and easy way to convert your files is to use an online tool like Offdrive.

You only need to visit the Offdrive main page through your browser. From there, you can start converting PDF to XLSX, vice versa, and more. The process of converting files using our free online file conversion service is simple.

All you need is to select the type of conversion you’re looking for. For example, you want to convert an older Excel XLS file to PDF. Select the “XLS to PDF” option on our list.

When you get redirected to the conversion page, click on “Browse” to upload your file. Verify that you are human by taking and passing the captcha test. After you verify the test, you can click on the green Convert button. 

Convert Your Excel Files Today

There are many other ways to convert your files from XLSX to PDF for free. These are only the top, quickest, and easiest ways to do them.

Are you looking for easy ways to convert your excel files? Check out our free conversion tools to convert your files to other file types today!

file compression

RAR vs Zip: Crowning the File Compression Champion

File compression is a great way to reduce the size of a file to take up less space on your computer. It also allows you to send and receive files faster, even on slower internet speeds. When it comes to compressing files, the choice usually comes down to the ZIP or RAR formats.

If you download and upload files on the internet on a regular basis, then you’ve seen and even use ZIP and RAR files. They’ve been the most popular file compression formats for decades. Despite their similarities, they have key differences that will help decide your choice.

In this guide, we’ll take a look at the RAR vs ZIP formats. Read on!

ZIP Format’s Background

ZIP is a compressed archive file format. It can contain more than one file or folder and uses the “.zip” file extension. It’s useful if you need to send both PDF and Word documents for a college paper submission in only 1 file.

It’s a format developed by Phil Katz released in 1989. ZIP was once part of the PKZIP utility of PKWARE. It was later supported by other software utilities.

In 1998, Microsoft included built-in support for ZIP in Windows. One common use of ZIP files is in software downloads. A single ZIP file encases all the essential components of a program before its transfer.

This makes the program efficient for storage space and time by reducing redundancy. The ZIP file will consume less space and bandwidth. It also retains the internal integrity and organization of the original file.

Besides compressing files, ZIP can encrypt your files through password protection. It also allows you to split archives with only a few clicks.

You can compress or zip multiple files using various methods. This includes LZMA, DEFLATE, PPMd, WavPack, and BZIP2, among others.

Each of the files has its own separate storage, allowing you to access and extract one at random. This means you can also add new files in the ZIP archive without re-zipping the entire archive.

ZIP files can also contain more content unrelated to the archive. This makes the ZIP format a self-extracting archive.

RAR Format’s Background

RAR stands for Roshal Archive. It’s named after its Russian developer, Eugene Roshal. It uses the “.rar” file extension.

Like the ZIP file, it’s used for storing multiple files that can be of different file types in 1 container. It’s also used for data compression to make files more efficient for storage and transfer.

As a compressed archive format, it’s common to encounter RAR files online. Users will often find these files on file-sharing sites and software downloads. RAR is also used for file scanning and error recovery.

Unlike ZIP, RAR is a proprietary format used only with the WinRAR archiver. This means you can only create and extract RAR files by using WinRAR. RAR uses a higher compression ratio than ZIP compression through its proprietary algorithm.

The WinRAR archiver is also capable of ZIP file compression and extraction. Besides ZIP, it can also operate on other non-RAR formats. It supports programmable self-extracting archives, error repairs, and embedded comments.

Operating System Support

ZIP was wider and native support across different operating systems. ZIP files are more accessible because they are open-source. On the other hand, RAR will require third-party software like WinRAR.

Windows offers native support for ZIP since Windows XP. Windows users can create and extract ZIP files with a default compress ZIP file feature. To use RAR, you need to buy and install WinRAR.

Mac OS X also supports ZIP along with other archive formats. You’ll also need to purchase WinRAR to compress file size using RAR.

Linux has support for ZIP out-of-the-box. You can use standard programs like File Roller to work with RAR files. However, you’ll first need to install the command-line utilities from the package manager.

Chrome OS supports both the ZIP and RAR format.

Key Differences

The basic difference is in licensing. ZIP is a format created to be standard for lossless data compression and is open-source. It uses several compression algorithms, with DEFLATE being the most common.

RAR’s proprietary compression algorithm may cause significant implications on various factors. Here are some key factors to consider when choosing between RAR vs. ZIP.

Accessibility

The ZIP format has an advantage when it comes to accessibility. ZIP’s wider OS support means it’s more accessible to users.

ZIP also gets its edge by being older than the RAR format. It’s still the most used and accounts for a large number of archive files on the web.

This is a crucial factor considered by software developers. They will want their files to be accessible to avoid complaints of being unable to extract files.

Compression

RAR can achieve a small file size than ZIP with the same file or set of files. The margin can be large in different cases.

The difference can vary depending on the file size and types you’re compressing. In a file compression benchmark test, experts tested WinRAR to compress a 310 MB test. They were able to compress the file by up to 71% of its original size, resulting in 90 MB.

Meanwhile, WinZIP can compress the same test file down to 125 MB. That’s a compression ratio of over 60%.

When it comes to RAR vs ZIP compression, RAR proves superior. If your main concern is storage space, then the RAR format is better than ZIP.

Speed

The ZIP format uses a less complex format structure to contain files. This makes it quick for both compression and decompression. It uses DEFLATE, an older yet common compression algorithm.

RAR compression is even faster than ZIP. This is because its compression algorithm is more efficient than ZIP’s DEFLATE compression.

Security

The default Windows and Mac OS support does not include password protection. Meanwhile, WinRAR has native support for password encryption. This gives the RAR format a security advantage.

Which File Compression Format Is Best?

When it comes to accessibility and popularity, the ZIP format wins. If we’re talking about efficiency and security, RAR takes the crown. The answer to which file compression format is best will depend on your needs and priorities.

Whichever format you choose, check your files if they’re in the file type you need before sending them. We can convert files like PDF to JPG online for free. Convert your files with OffDrive today!

convert PDF

How to Convert PDF Files for Your Kindle

Almost 20 percent of people reported owning a Kindle or other e-reader device. The Kindle’s easy-to-use features and lightweight functionality make them extremely popular to read books, magazines, newspapers, and their own PDF files.

While downloading e-books onto a Kindle may be seamless, downloading your PDFs onto your Kindle is a different story.

Many people do not know how to convert PDF files from their computer or phone to their Kindle. If this sounds like a familiar problem, have no fear. 

We have created a complete guide on everything you need to know about converting PDF files to read on your Kindle. 

Convert PDF Files from Your Desktop or Laptop

The first way many people think they can convert PDF files to their Kindle is through their laptop or desktop device. Whether or not you have an Apple or a PC, here are the steps for transferring PDF files from your computer to your Kindle. 

First, locate the exact PDF file or files you want to convert to your Kindle. There is nothing worse than going through the hassle of transferring over a PDF only to discover later that it was the wrong one. 

Once you have the correct PDF file, plug in your Kindle to your computer with a USB cord. You should see the name of your Kindle show up in either the Explorer section of Windows or the Finder section of Apple.

Open the Kindle in either the Explorer or Finder section and click on the “documents” folder. 

Next, you can either copy and paste the PDF file you want to be converted directly into the “documents” folder or simply drag and drop it into the folder.

Once you have deposited the PDF file into this folder, you are done. You can do this for as many PDF files as you need to be converted. 

You will see the newly converted PDF files in your library the next time you use your Kindle.

Send PDF Files to Your Kindle Via Your Email

Another, less well-known way of converting PDF files to your Kindle is to send them through email. This hack for converting PDFs is a great option if you are traveling, on-the-go, or do not have access to your laptop or desktop. 

Here are the steps to take if you want to send your PDFs to your Kindle. 

First, log on to Amazon and go to the “preferences” tab under the “manage your content and devices” section. Go to “personal document settings” and then from there, go to “send to Kindle email settings.”

There you should be able to find the “approved personal document email list.” Verify that your email address is listed in this section. If not, add it now.

Next, you need to find your Kindle email address. Finding this address will enable you to send converted PDF files directly to your Kindle from your email.

To find this, go on your Kindle and go to “app settings.” Verify what the email address is under “send to Kindle email address.” 

Once you have all this information, you can now send PDF files via email. Open up a new email draft. Put “Convert” in the subject line and attach the PDF files you want to read on your Kindle. 

Type in your Kindle email address in the address field and click send. Once the email is sent, you should be able to read the PDFs on your Kindle with ease. 

How to Read PDFs on Your Kindle

Following any of these methods listed above will help you read any type of PDF on your Kindle. In both scenarios, you will need to give it a few minutes to allow for the PDF files to load completely.

It should be noted that there may be minor formatting issues you see when reading these converted PDF files. Some common issues you see could be indents being a little off, spacing issues between paragraphs, and more.

If your newly converted PDF has images included in them, there is a chance that they may not load all the way or have formatting issues as well.

A good rule of thumb to prevent most formatting issues when converting PDF files is to send from a laptop or desktop rather than emailing them. 

Emailing PDF files to your Kindle is a great option for when your PDFs are text-heavy and you are not near a computer. However, emailing PDF files typically sees the most issues with formatting. 

Formatting differences aside, reading your PDFs on a Kindle is a great way to read through work documents or academic textbooks. If you are a writer, sending PDF files to another person’s Kindle is an easy way to get more people to read your work.

Looking for More Tech Tips and Tricks for Kindles?

File conversion can seem like an extremely tricky matter to many people. For that reason, most people avoid using their Kindle to its full capacity simply because they do not know how to convert PDF files. 

We hope this comprehensive guide has taught you the best ways on converting PDF files to your Kindle. Take the power of the Kindle back into your own hands to read more than you have before by converting PDF files. 

If you are looking for more info on how to convert PDF files to your Kindles, visit us at Offdrive. Our blog has all the latest insights and trends into tech tips and tricks to make your life easier. 

Posted in PDF
raw files

What Are RAW Files and How Do You Convert Them?

When you are taking photos with a professional digital camera, you are going to have to deal with RAW files, unless you change the default format. And for some, this can be a problem. 

However, it doesn’t have to be. RAW files are of the greatest quality, because they store all of the image data, allowing users to adjust the variable how they like.

In this article, we will cover these files in more depth. As well as teach you how to convert them for whatever needs you have. 

Whenever you’re ready to take your photo editing journey to the next level, keep reading.

What Are RAW Files?

There are many types of RAW files. The most common is the.RAW extension for a Photoshop file, used in certain scenarios like image data transfers between applications. This format describes the color information of pixel-by-pixel text in binary form.

It has nothing to do with RAW image formats that are created on digital cameras. Digital camera RAW image files provide the greatest quality because all of the camera sensor data is saved in an uncompressed and unprocessed form.

Some examples of these image formats are Nikon NEF, Olympus ORF, Fuji RAF, Sony ARW, Adobe DNG, Canon CR2, Panasonic RW2, and many others.

Camera raw images allow editors to change the photo parameters however they like because there were no modifications already made. Processed photos will usually end up in a .JPG or.TIFF format.

A RAW file might also represent a Raw Audio Data file, in which the same concept of lack of compression and processing is applicable. Other files with.RAW might be for the GameCube Emulator or Wii.

How to Convert RAW Files?

You have several options when it comes to converting RAW files. For instance, digital camera RAW files can be converted with a built-in converter. 

Nikon cameras often come with an option to convert within the device. Although convenience is a virtue, the tools only let you adjust some attributes. Not to mention, there’s an issue of judging the exposure, color, sharpness from the camera monitor. 

A small screen will present an image much differently than a computer monitor. Having the conversion option on your camera in a rush is great, but it should not be your go-to option.

How many image attributes you can adjust will depend on the software of your choosing, so if you’re looking for a program to convert your files, research intricately.

Some simple programs change the format .RAW to another, applying the same attributes the camera used when you take the photo in the original format.

Adobe Photoshop has a converter that allows you to adjust several panels of image attributes. For specifics on in-camera conversion, you will need to look at the manual. You can also find specific tutorials that are designed for your applications of choice.

General RAW Conversion Rules

In any case, there are some general rules to follow when starting with a RAW conversion. First and foremost, you should never delete your original RAW file. 

You might want to convert the file again with a different setting someday. Keeping the RAW file means you will have a pristine condition that you can return to whenever you like.

The settings used when making the conversion will stay with the RAW file, sort of like an outline of a recipe. The next time you open the file, you will not have to make adjustments again. They have applied automatically. 

Because your image data is still RAW, you can apply new adjustments without doing any damage to the image. To retain the greatest image quality after conversion, save the file in TIFF.

TIFF is a non-destructive format. It preserves as much of the image data as possible. This means you get the best quality, which is why TIFF is the standard for publishing. 

Most word processing, photo editing, and publishing software can work with TIFF. Most retail labs print TIFF primarily. Other non-destructive formats are PSD and PNG, which is why Photoshop uses them natively. 

PNG is compatible with practically all programs, but very few offer compatibility with PSD files. So if you want to make things simple and nobody requires more of you, simple use TIFF.

TIFF Downside & JPEG Use

TIFF does have one issue, however. Pictures in this format will be of much greater size than JPEG. But that’s what you have to deal with if you want to retain the best possible quality. If you want to use your converted image online, you will need to store it in JPEG.

TIFF cannot be worked online. Emails, browsers, and other apps don’t display them. JPEG is the universal photo format and is also compatible with almost all software/retail locations.

Just know that JPEG is a loss format, which means you will experience quality depreciation because of the compression. As far as RAW conversion, the best practice is to save two copies, one in TIFF and one in JPEG.

Image Conversion Online

Now that you know what RAW files are, as well as how to convert them, you are that much closer to making sure you get the results you want. As long as you know what file you want to end up with and which attributes to retain, you will get exactly what you want. 

And if you’re interested in converting the various image files to any other image format, check out our online conversion tool for free.

what is an APK

What Is an APK File and How Do You Open It?

Have you ever seen an APK file, but wondered what it was? Well, you’re in the right place to find out what you need.

In essence, an APK is an archive file for applications on the Android OS. However, that’s not the only way to describe it, APK does so much more than that. 

In this article, we will cover everything you need to know about what is an APK so that you can have a full-fledged capacity of using it. 

Whenever you’re ready to learn about APK and what it’s for, keep reading.

What Is An APK?

APK, also known as an Android Package Kit is a file extension for a file that is used to distribute applications for the Android OS. It’s the .exe alternative of Windows OS used for installing software. The APK contains all of the necessary data of the application, starting with its resources and going as far as the manifest of the compiled app code.

Most android users download APK files from the Play Store when installing an application. The only reason they don’t know about it is that Android does everything in the background, you only see the front-end. If you know how to manually install applications, there are many other sources for APK files.

Nonetheless, you should be very cautious about downloading APK files, as much as you would be cautious about .exe files. Malware is easily stored in these files and can ruin your device.

These are the following prominent components of a regular APK file.

  1. META-INF: signature, manifest file, list of archived resources
  2. lib: native libraries for device architectures
  3. assets: raw resources that are bundled with application
  4. res: resources not compiled
  5. AndroidManifest.xml: version, name, and contents
  6. resources.arsc: compiled resources
  7. classes.dex: compiled Java classes

And that’s pretty much it. However, APK files can be customized to other specifications, making the contents variable. Now that you know what is an APK, let’s discover how to open it.

How Do You Open an APK File?

APK files are not restricted to being opened on Android. They can also be opened on MAC, Windows, etc. Opening APK on android simply requires the downloaded file and then opening it via a click. But APK files installed not on Play Store will not install right away, there is a firewall that prevents that from happening.

To bypass the installation restriction on unknown sourced filed, navigate to one of the following menus.

  1. Settings > Apps & Notifications
  2. Settings > Security
  3. Settings > Apps & Notifications > Advanced > Special App Access > Install Unknown Apps

Depending on the version of your device, you might need your application form which you download (Edge, Chrome, Brave) to have permission for installation. If you see Unknown Apps or Unknown Sources, enable that option.

If the APK does not open, browse it with your file manager. If you don’t have one, try Astro or ES File.

On Windows

You can also open APK on Windows using an emulator for Android. BlueStacks is a very popular example. In this application, you visit the My Apps tab and then click on the Install APK option in the corner.

After doing so, you can browse through your files and install any APK you like.

On Mac

Android apps can be tested on Mac as well, but not natively. ARC Welder is an extension for Chrome that runs on all OS. This means you can open your APK on any computer, as long as you have this extension.

On IOS

You cannot install or open APK on iPad or iPhone because the file build is incompatible with how applications work on IOS. The two platforms are not cross-compatible, but emulators can potentially solve this problem.

APK Extraction

Another way to open APK files on any of the potential OS is via an extractor tool. Since APK is just an archive of folders, you can unzip it with WinRar, 7-Zip, or PeaZip to see what makes up the application.

Doing this will not let you use the APK file on the device. To do this, you will need an Android emulator on your device which will run the necessary Android OS on your device.

How to Convert APK?

Even though file conversion is usually done with an application, it’s not really applicable to APK files. That’s because APK files are designed to run on certain devices only, unlike other files like PDF or MP4 that can are opened on many platforms.

Instead, if you want to convert your APK to an archive like ZIP, you will use the extractors mentioned above. Either open the file in the extractor and repackage it, or you can simply change the .APK extension to .ZIP.

This might seem odd because renaming a file does not actually convert a file. But it does work with APK files because the format is already using .ZIP, it’s just appending it as .APK.

You cannot convert APK to IPA for IOS use, neither can you convert APK to EXE for Windows using. But you can certainly find an alternative that works in place of the app that you want to install. Most developers have the same application available on multiple platforms but in the appropriate format.

Instead of using a non-existent APK/EXE converter, you simple open the Windows APK opener and then use it to open the application. It does not need to be .EXE for it to work.

You can also convert APK to BAR to use the application on BlackBerry devices. This is done by uploading your file to the converter, like a Good e-Reader. The conversion happens automatically and then you can download the BAR file back to your device of choice.

Ultimate File Conversion 

Now that you know what is an APK, you are that much closer to unlocking the full potential of its use. Unfortunately, there is not a way to convert APK to other platforms, but there are workarounds as mentioned above.

If you’re interested in a variety of file conversions directly in your browser without downloading software, check out our conversion solutions.

7Z

What’s a 7Z File and How Do You Open It?

Do you want a free and easy way to compress your business and personal documents by up to 70%?

The answer lies with 7zip, an award-winning file compression archiver that’s used by millions of home and business users. It also offers high-end encryption to keep your spreadsheets, images, and files safe from prying eyes.

This article looks at the 7z file software and how to open 7-Zip files. 

You’ll learn all about the compression format along with the major benefits 7-Zip has to offer. Discover the differences between 7z, RAR, and Zip. Then see how to convert between several archive compression formats online for free.

Read on to find out why 7-Zip is a must-have tool to compress and secure your data.

What Is a 7z File?

7-Zip or the 7z format is a type of file compression software, similar to the popular .zip format found in Windows.

A 7z file looks and acts like a folder. It groups files together and uses an intelligent algorithm to remove unneeded data which reduces the overall file size.

This algorithm is called LZMA and it offers:

  • Fast compression and decompression speeds
  • Higher compression ratios than other archiving algorithms
  • Small code file size and memory requirements
  • Works with multi-threading for faster processing

All of these innovations allow you to take several files or folders and compress them to 30-70% of their original size. You can then send this group of files together via email or upload it to the cloud with ease.

Benefits of 7-Zip

The 7-Zip format is recognized as having better performance than regular zip files because it offers:

  • Full control over how you archive and compress
  • 256-bit AES encryption to keep files safe
  • Higher levels of compression at faster speeds than Zip
  • Opens other compression formats like BIZIP2, TAR, and X2

A popular rival to both the .zip and .7z formats is RAR.

RAR stands for Roshal Archive, named after its creator Eugene Roshal. Half-a-million users have downloaded the software and use it to compress their files. However, the WinRAR tool comes with a financial cost — approx. $55.

The biggest benefit of 7-Zip is that it’s free!

You can download the 7-Zip File Manager and it won’t cost you a penny. Also, benchmark tests that compare the three formats prove that 7z offers the best service.

Why use a worse product that costs money when 7-Zip does it better at no cost?

Opening 7z Files

What’s the best way to open a .7z file?

Firstly, download 7-Zip File Manager if you use Windows. macOS users must download an alternative compression software tool called Unarchiver. Both are free.

Make sure to choose the latest version of 7-Zip File Manager that matches your operating system (32-bit or 64-bit). You also have the option to download an executable (.exe) or installer (.msi) file or a standalone option (.7z).

For full integration with Windows, it’s best to choose the .exe option.

Follow the on-screen installation instructions and accept all the defaults. You need to have administrative privileges to be able to do this.

Program and Windows Shell

Once installed, you have two methods when opening a 7z file:

  1. Through the file manager program
  2. Via Windows Explorer (Windows Shell)

Opening the file manager gives you a host of options including adding and extracting files and copying/moving data.

Beneath the icons is a list of files in your Documents folder. You can navigate to another directory like Downloads or wherever the 7-zip file is located that you wish to open.

To view the contents of the 7z file or any compressed file like .zip, simply double-click it.

You’ll see a list of the files and folders along with their full file size, compressed size, and other useful attributes. You can order files by attribute by clicking on the header row.

Double-clicking a file will open it in a temporary location, a bit like a preview. But it’s best to extract the file(s) by clicking the Extract button. Choose the destination and the software will unpack them there.

Windows Shell Integration

7-Zip also integrates directly with Windows Explorer.

Open Explorer and navigate to the file you want to extract. Right-click and you’ll see a 7-Zip menu option. Moving your mouse over this branch displays a list of choices including ‘Open Archive’, ‘Extract Files…’, and ‘Extract here’.

Choose the latter to automatically extract all the files/folders contained within the 7-zip file to the current directory.

7z Conversion

Although 7-Zip can open different formats, that doesn’t mean that your friends or workers have the software installed.

They may only have WinRAR on their computers or no compression apps at all. In any case, you’ll need to convert your files to a different type.

The great news is that Offdrive lets you do this for free!

Convert 7z to Zip

Use our 7z to Zip online conversion tool to change your files into a format that everyone can open.

Although .zip files don’t offer the same functionality, Windows can read and open them. That means they’re guaranteed to work.

7z to RAR

For WinRAR users, convert 7z to RAR format.

All it takes is for you to upload your file and check the reCAPTCHA box to verify that you’re human. Hit Convert, wait for your file to process, then download it to your computer.

7z to TAR

Linux users often use the TAR compression format. Converting 7z to TAR sounds complicated but it doesn’t have to be with our online tool.

Remember, all of our conversion services are free. And you can upload and transform as many files as you want.

Free Online Archive Conversion at Offdrive

7-Zip files offer an excellent compression to speed ratio for reducing the total file size of your data.

The 7z extension brings with it built-in AES encryption that’s unbreakable if used with a strong password. The 7-Zip File Manager for Windows even integrates with Explorer so you can right-click a folder and compress it within seconds.

7z conversion is easy thanks to Offdrive’s free online Archive Conversion tools. Not only can you convert 7z to Zip or RAR formats but our service lets you convert formats in reverse.

Want to transform your RAR file into a 7-Zip archive? Then use our free tool to upload and convert as many files as you need.

video file

Top 8 Video File Formats of 2021

There are over 30 different types of video file formats currently in existence. But not all are still in regular use. Support for Adobe Flash player ended in December 2020, so the FLV video file format will be a has-been file type soon enough.

With video technology changing every year, it can be difficult to stay on top of the best video file formats to use. But it’s important to do your research and choose the appropriate format so that you can share and upload your work without any issues.

You want to make sure people can watch your videos in the quality you intended!

The guide will explain all the top video files still in use in 2021. It lists their specifications and in which purposes to use them. 

1. MP4

MP4 is an Apple video file format that is technically called MPEG-4, but .mp4 is the file extension so that’s why MP4 is the more common name. It’s a progression of Apple’s QuickTime file format.

Apple created MP4 way back in 2001 to work in low-bandwidth internet connections and for the file size to be as small as possible. So MP4s are compressed more than other file types, which means the quality is good but isn’t the best. 

This is not one of the best video files to export your feature-length documentary in!

But it’s an extremely common video file type and will work on the vast majority of media players. This is regardless of whether the players are Apple devices or not. It’s perfect for general social media sharing and slideshow presentations.

2. MOV

MOV is Apple’s main alternative to MP4 video files. It is now Apple’s preferred QuickTime player video file and is much more ideal for movies and professional videos. Canon cameras usually record MOVs.

MOV files can hold video, audio, subtitles, and timecode metadata which is perfect for videographers and editors. However, it is primarily an Apple file type for Apple devices and fewer media players recognize it. Some of the few that do include QuickTime, VLC, and Windows Media Player.

And because MOV videos are generally higher quality and hold more information than an MP4, for example, the file sizes are bigger. If you have a MOV video and need to make the file size smaller, you will need to use a video file converter to compress it.

3. WMV

WMV (which stands for Windows Media Video) is, unsurprisingly, a Microsoft video file format. They created it to rival Apple’s MP4 though it never quite matched the latter’s popularity.

Because it’s built to match an MP4, its benefits include compressed, small file sizes. This is perfect if you want to attach a video to an email or send a video over social media. 

However, the quality isn’t the best. And while Microsoft-owned media players will offer WMV playback, but many third-party players don’t. If you want a video file format that is guaranteed to be universally accepted, a WMV file format isn’t the one to choose.

4. AVI

And if WMV was Microsoft’s attempt to dominate the compressed video file format market, then AVI is their attempt to rival Apple’s MOV video file!

Developed way back in the 1990s, AVI is one of the best video file formats available, especially for professionals. It stands for Audio Video Interleave and many Nikon and Olympus cameras record in this file format.

AVI is usually a safer bet than MOV at being compatible with more media players.

However, the uncompressed video file sizes are huge. They are often much bigger than MOVs and can be around 2-3GB. 

5. M4V

An M4V is essentially an MP4 with one main difference: security and encryption.

Apple developed the M4V video file format to protect videos bought on iTunes. These videos were encrypted with DRM (Digital Rights Management) FairPlay copy protection. This means they could only be played on devices attached to the owner’s account.

Not every video needs data encryption so it’s not an ideal file format for everyone. However, if you are creating media that will sit behind a paywall (Patreon, audiobook, etc.) then encryption might be necessary.

M4V files play on any media player that accepts MP4s.

M4A is another similar video file type to the MP4. It’s more of a predecessor to the MP4 format as M4A is usually an audio-only file. The audio tends to be better quality than MP3 or WAV.

It’s extremely easy to convert an M4A file to an MP4 as you can just alter the file extension.

6. WebM

Google developed the WebM video file (also goes by the name HTML5) back in 2010. They’re generally compressed, smaller-sized videos designed for website streaming. Google made the WebM file with the future of internet streaming in mind.

So, if you have a video portfolio or a video-heavy website, then using WebM video files means you can display videos without compromising video quality or site speed/loading time.

However, it’s still not a popular choice of video file format. Many website owners still prefer to upload their videos on video streaming platforms like YouTube and Vimeo and embed the videos onto their websites.

Only time will tell if WebM makes a comeback!

7. MKV

Speaking of the future, MKV is supposedly a future-proof video file. The software developer Matroska developed this file back in 2002 to stay updated with the latest codecs.

MKV can handle audio, video, and other multimedia clips and contain them into one single file. It’s perfect if you need to add audio dubbing to a video or extra subtitle options.

It’s not as common as some of the other video file types on this list, but it’s highly adaptable and universally-accepted by most media players.

8. AVCHD

The final video file format on this list is one of the newest and most advanced. AVCHD stands for Advanced Video Coding High Definition and it’s a format Sony and Panasonic developed in 2006.

Because it’s their video file format, most Sony and Panasonic cameras will record in AVCHD. It was originally made for higher-end home video cameras and AVCHD 2.0 even supports 3D footage. 

It also has fantastic compression which means smaller video file sizes that keep the same level of quality. 

Use the Ideal Video File for Your Creations

Now you know exactly which video file is best suited to your needs! So, you can upload and share your videos with zero tech issues while retaining excellent quality.

Video file formats are always changing and updating. It’s important to check you’re still exporting and encoding your videos in the best format.

Our service offers free document, spreadsheet, image, and archive conversion. If you need tips on how to convert common file types (like videos), check out our blog post here.